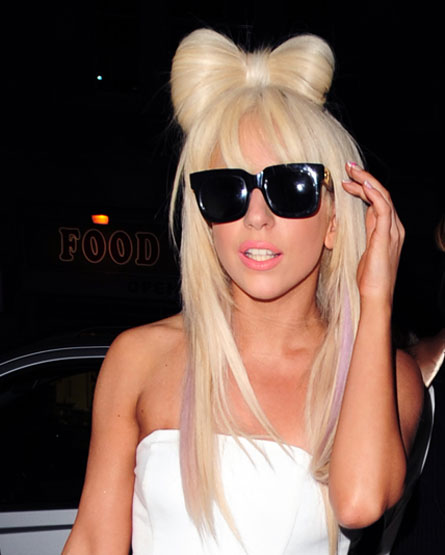
 Lady Gaga has been such an icon to the pop culture. I myself has also been captivated by her styles, looks and music despite being bullied by other religious groups as blasphemous, anti-Christ and illuminati. Well after all, this is not the business today. I'm going to show you the easiest way to do the LADY GAGA HAIR BOW. This time, we're going to break the conventional ponytail for a while and start making a statement. I've posted this look just a week ago in Facebook and Instagram and a lot of people asked how did I do it. So here's a step-by-step tutorial + pictures!
Disclaimer:
I cannot make the hair bow as exactly as Lady Gaga's because I'm 101% sure she wears hair extensions. Plus, I don't have a full bangs at the moment!

LEGEND:
1. Take a small amount of your hair on top. Make it a little bit higher so the hair bow will be visible.
2. The back view of instruction number 1.
3. Secure the half of the hair with an elastic. Better if you use sanrio elastic but in case it cannot tolerate your hair, you can use a thicker elastic ponytail.
4. DO NOT make it into a ponytail. Make a fan-shaped bun out of it just like in the picture. The bigger the bun, the bigger the bow you can create. For rebonded/straight hair, you may tease that portion of your hair before securing it with a ponytail to create a volume on it that will make the bow stand and visible. Put the rest of the hair in front. This will be the middle of the bow later.
5. Divide the fan-shaped bun in half. Make sure you divide it evenly.
6. Pull the excess/rest of your hair at the back.
7. In this step, you shall now see the bow on your hair as put the excess hair the back.
8. After pulling the hair, the back should look like this. Secure the tail/excess hair with bobby pins/hair pins. Make sure it doesn't go back in front anymore. Put hairspray if necessary.
9. CAREFULLY pull some hair out to make the bow bigger. It requires longer time before you achieve a perfect bow by pulling the both sides.
DONE!
All you need:
comb
teasing comb
elastics
bobby pins/hair pins (I only used 2-3 bobby pins for this look)
It looks better for people with thicker hair because they can achieve a bigger bow.
HAPPY STYLING!

No comments:
Post a Comment